Category: <span>Projects</span>

Needle Juniper After Summer Maintenance January 2018 Project 3

Large Tosho Foemina Needle Juniper Bonsai – Summer Maintenance…

It’s that time again for a prune and clean up for this juniper and I like doing this work in the summer period. Originally thought to be a Needle Juniper it’s now identified as a Foemina Juniper. Here’s the tree before the work –

It’s a large tree and starting show some maturity now which is really pleasing. One thing a needle juniper will teach you is to be delicate which your handling of the bonsai or you’ll pay the price! There was a lot to clean out in the pads too as they had grown way too thick and there was no light or airflow which will result in foliage dying. Here’s the after pics –

There was quite a lot removed and the work was performed over a 3 day period.


Needle Juniper After Summer Maintenance January 2018 Project 3

Large Tosho Needle Juniper Bonsai – Summer Maintenance January…

This Large Tosho Needle Juniper Bonsai has been really well fed, given loads of sun and plenty of water with no work done since being repotted. The focus has purely been on the health and vitality of the tree. I followed the basic principle of patience…

But January 2018 is the time for the Summer maintenance which is primarily pruning to shape and removing wire as needed. Here is where the tree started before work commenced –

Needle Juniper January 2018 Before

It looks very full and I’ve been waiting to give it a clean up for a long time now but did not want to rush the process. All good things come to those who wait.

So starting at the apex and working my way down the tree, I started cleaning up the pads. Here’s about half way from the side view –

Needle Juniper Summer Maintenance Progress
About halfway

I am really pleased at the volume of foliage this tree has now but not so keen on the sharpness of the needles. All work was performed using scissors and tweezers so it’s not so bad.

The foliage that had grown had some scale as well as needle and it was pointed out to me that it may be a Juniperus foemina. This may well be as this scale foliage has only occurred in this growing season.

Juniper Needle and Scale Foliage

And after 2 long sessions over 2 days here is the final result –

Needle Juniper After Summer Maintenance January 2018

Just to see how far this tree has come, here is a photo from July 2015 showing how the tree was purchased. It just reinforces my belief that to develop good bonsai you just cannot rush the process. Correct actions taken at the right time will end in a better bonsai.

Needle Juniper July 2015

Project 1

Japanese Black Pine #21 – August 2017 Update –…

It’s only been one year since this tree was repotted and I wanted to inspect the root growth after my feeding regime and the open mix that was used at last repot. It was becoming difficult to water due to the density of the roots and I’m aware repotting this soon may encourage more coarse growth than if it was left but my focus is still on the roots and ensuring this pine is as strong as it possibly can be.

Here’s what I found after just one year – 

There was a lot of roots and they had just woken from dormancy so the timing was perfect. There was lots and lots of mycorrhiza too which always puts a smile on my dial.

I changed the pot as well.

And the end result. Now the plan is to work on the ramification and structure of the tree. The roots are just where I like them.

Project 2

Trident Maple #11 – Update July 2017

It’s the start of the repotting season here in Melbourne, Australia and also time for an update on this Trident Maple Bonsai. The root mass has become quite dense and I’m pleased with the development of the roots. I find repotting very satisfying and shows the rewards of the care you give your trees.

Here’s the view when it was removed from the pot. Plenty of roots!

It is always pleasing to see a mass of fine feeder roots.

On my last trip to Japan I purchased a pot with this tree in mind. It’s got really nice patina and will be perfect for the tree as it continues to develop. The maker is Hattori.

So another step taken in the development of this Trident Maple!

Trident Maple Air Layer Repot July 2017
Project 1

Japanese Black Pine #21 – April 2017 Update –…


So this Japanese Black Pine has had plenty of time for recuperation and to develop a solid root structure. It’s been well fed and left to just build its overall strength and vitality. There is a lot of mycorrhiza visible just below the soil surface so everything looks like it’s heading in the right direction. I have been very keen to get into this one and do the initial structural wiring but I’ve held back…until now.

Here’s the tree as it came of the bench.

There were 3 sacrifice branches that were allowed to run and increase vigour. These will be removed as I’m a little concerned that the tree is putting all it’s energy into the sacrificial growth and not the remaining buds. 

The wound at the back of the trunk has been healing well and it was reactivated and covered with wound putty again. The snails had eaten the last lot!

So the first job was to prune unnecessary buds and branches and remove old needles and just balance the energy of the tree.

The trunk still impresses me and gives me hope.

Warts and all, this is the initial rough wiring of this bonsai. Keep in mind, this is not show wiring but ‘setting the bones’ for the future. 

I’m really pleased with how it is progressing and even though it has been a long, patient journey, that’s what it is, a journey. 


Project 3

Large Tosho Needle Juniper Bonsai – Repotting September 2016

The time has come to put this Tosho Needle Juniper Bonsai into a bonsai pot for the first time. Enough time has passed since any work has been carried out and the tree is very healthy.

img_1494

Obviously the first job was to remove the tree from the nursery pot. It was jammed in there nice and tight so I knew there’d be plenty of roots.

img_1496

img_1498

The tree is so tall and generally big that I needed to work the roots on a low barrow. First inspection of the roots showed very promising results. There were no thick roots and plenty of the fine feeder roots. I deliberately selected a first training pot that would not mean a massive reduction in the root mass to help with the transition from the plastic nursery pot. I want to minimise the shock as much as possible and this first pot is not the forever pot. Further reduction can occur at a future repotting session.

img_1499

Checking for size. You can see the fine feeder roots.

img_1500

The tree was then secured into the pot.

img_1501

Then the mix was added and worked into the pot using a chopstick. The surface was covered with sphagnum moss and thoroughly watered. And ta-da! Done.

Tosho Needle Juniper after repotting September 2016

I’m really happy with the progress of this Tosho. The pads are starting to form on multiple levels and there is still more work to be done on the shari and deadwood but that will come. For now it’s shelter for 3-4 weeks with minimal exposure to the elements then feeding heavily.

Project 1

Japanese Black Pine #21 – August 2016 Update –…

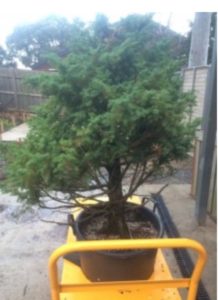
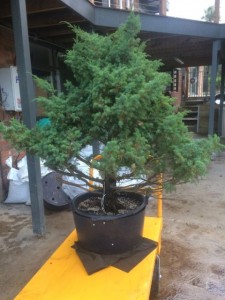
Well it’s been 3 years since I first acquired this tree and repotted it with the only focus being on the strength of the roots and overall health of the tree. Sometimes you just cannot rush; patience really is a virtue.

IMG_1178

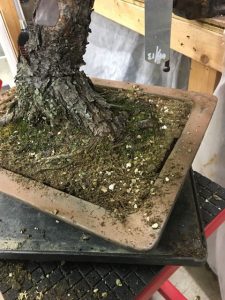
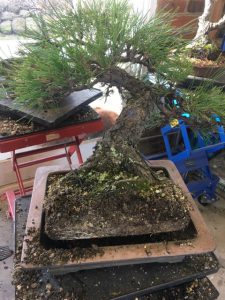
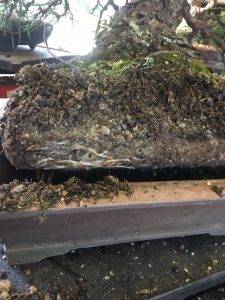
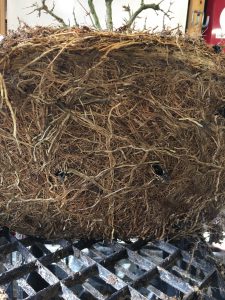
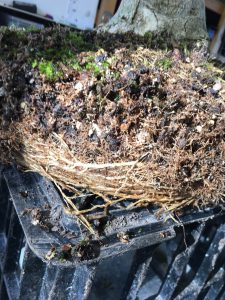
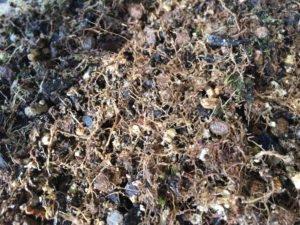
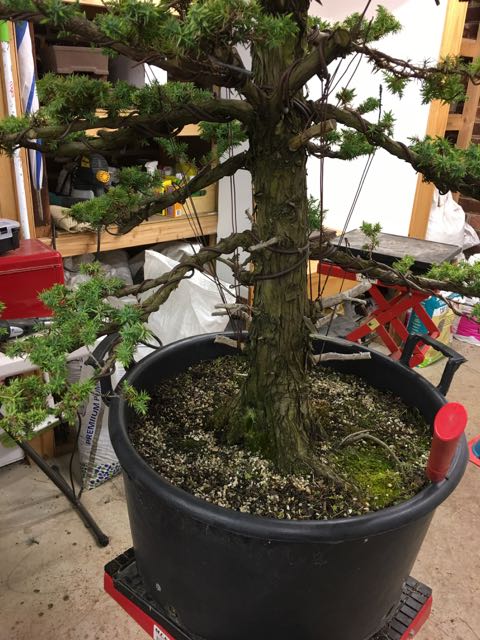
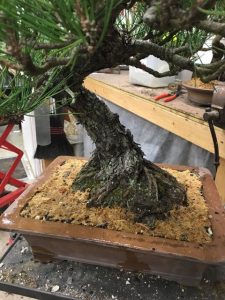
Initially the tree was removed from the pot. The roots had grown so thick and dense that it took quite some effort to free the tree. The akadama that was in the mix had broken down as it does, and a repot it due.

IMG_1179

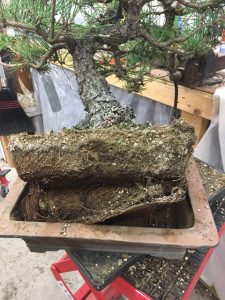
The roots that had developed were very pleasing to see.

IMG_1181

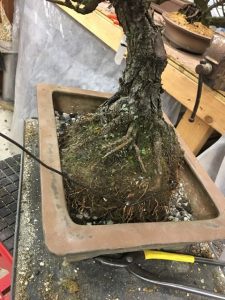
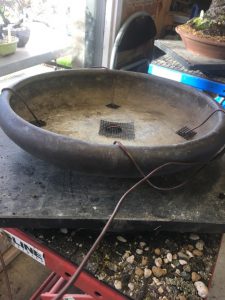
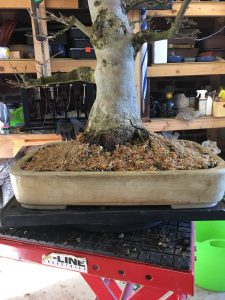
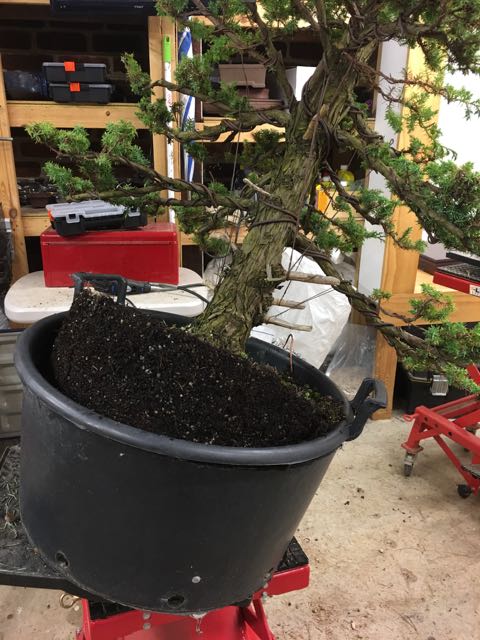
The roots were pruned, and the nebari corrected in a few minor places then the tree was secured back into the same pot. I like this pot as it’s an old one that was purchased on a trip to Osaka and the style suits this tree.

IMG_1182

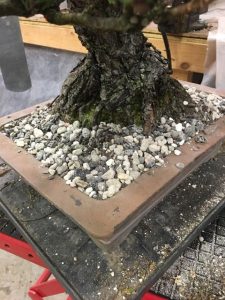
The mix was worked into the pot and then levelled.
IMG_1183

IMG_1185
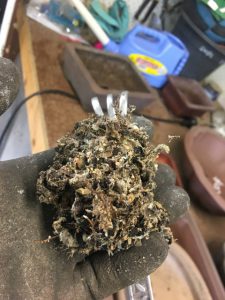
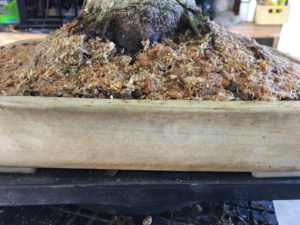
Sphagnum moss was chopped and put on top.

IMG_1189
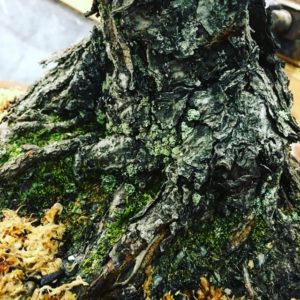
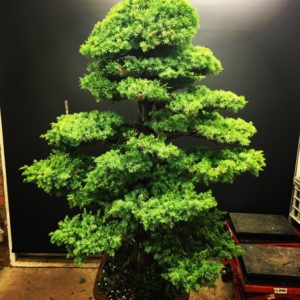
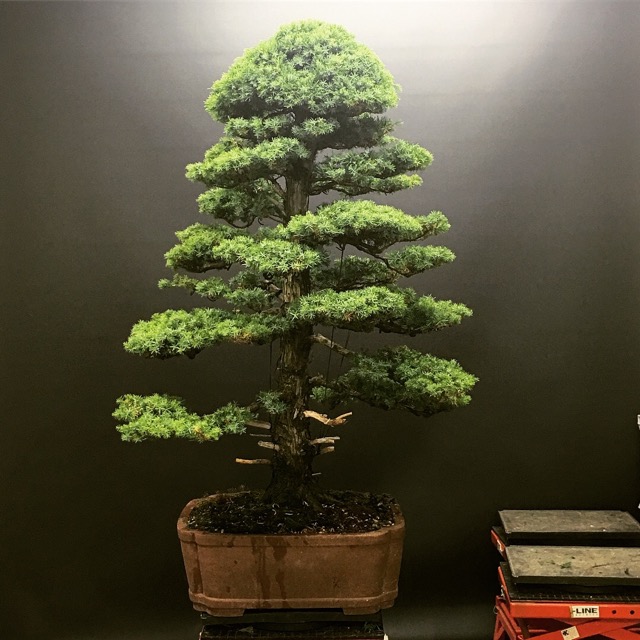
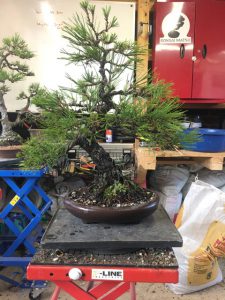
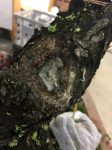
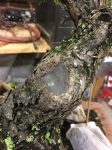
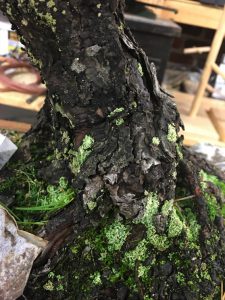
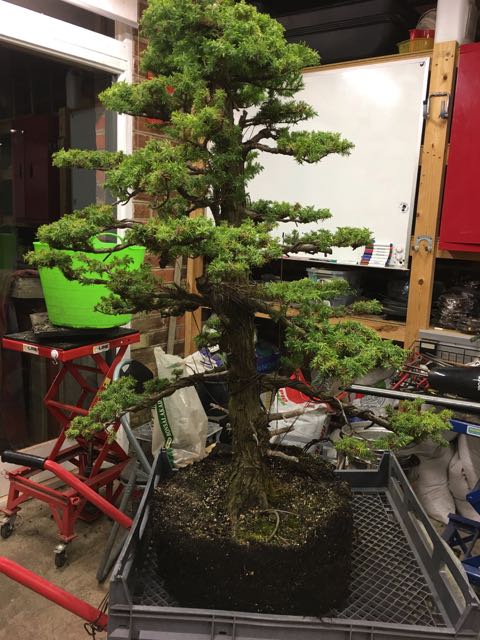
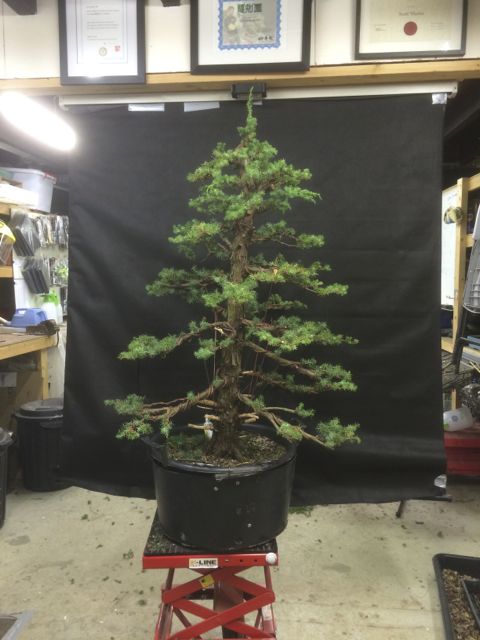
The lower trunk is one of the most pleasing features of this tree. The age is really starting to show and makes the work that goes into this bonsai all worth it.

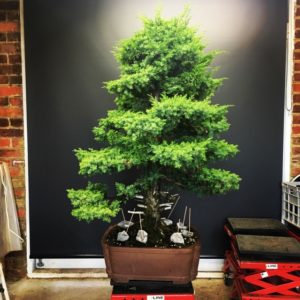
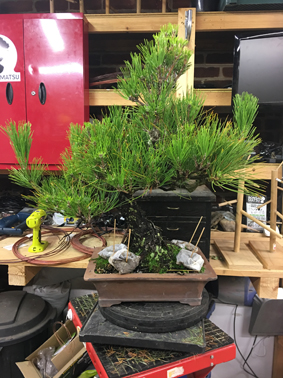
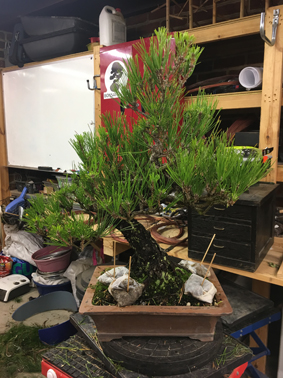
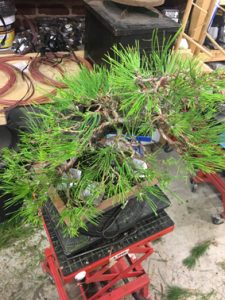
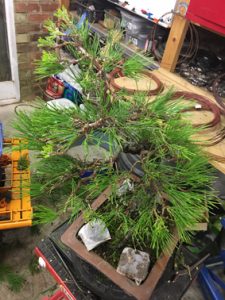
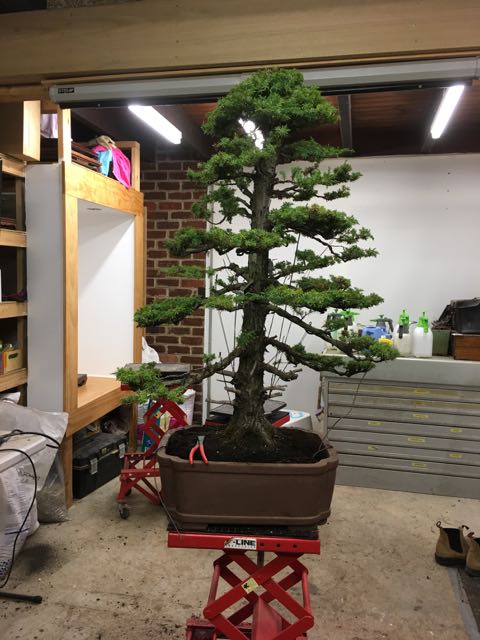
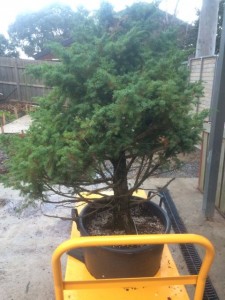
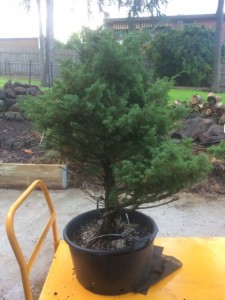
So here’s where the tree was and where it is now –

P1080106IMG_1190

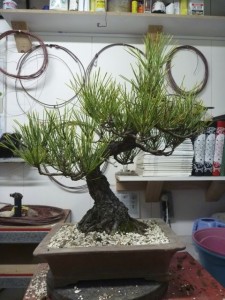
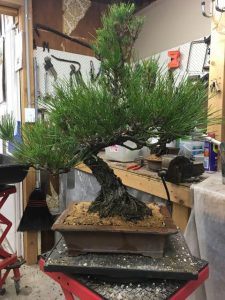
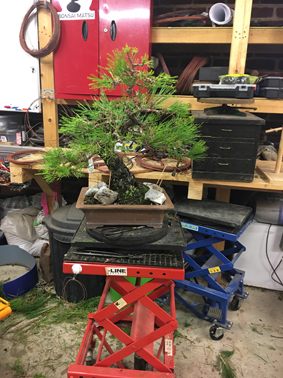
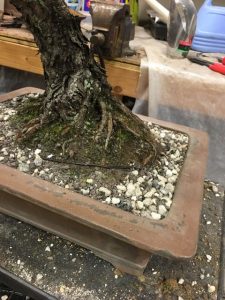
The tree was tilted to the left to enhance the first movement on the lower trunk and to also make the second bend less horizontal. It also brings the apex back over the centre of the nebari. The tree was also rotated slightly clockwise in the pot so the apex is now leaning forward a little more.

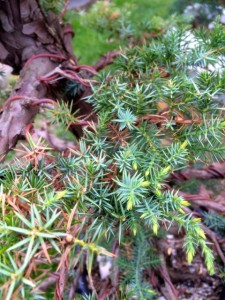
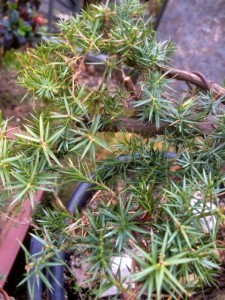
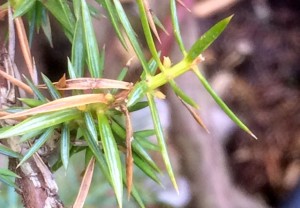
You can see from these photos that the tree is looking far more vigorous now and a nicer shade of green (as opposed to yellow). The tree still hasn’t been wired and depending on the spring growth, this may be on the cards for summer when the tree is decandled. Or, it might just wait until autumn next year. No rush. That’s why this is a project and not just a styling.


Project 3

Large Tosho Bonsai – September 2015 Initial Work

Well it’s taken quite some time and a few blood transfusions but the initial first rough styling is done. The main task at this point is to bring down the branches which are all quite thick. So heavy copper wire and guy wires have been used. There was no need for raffia and there were no tears or breaks.

IMG_5513


So here’s a refresher of where the tree was before any work was done.

IMG_6348


And here it is after. There is still a very, very long way to go but it’s a great first step. The lowest right hand branch may be removed but my concern is the branch above it on the right side points to the rear of the tree so it will have to wait for the next session.

A lot of the Tosho I’ve seen have large areas of shari but I’m not sure that will be the case with this tree. I’m not ruling it out but I really like the lower trunk and the flakey bark it has developed.

Time for a rest, good feed and some recovery.


Oh, and one lesson I’ve learned with the initial styling of a Needle Juniper…wear long sleeves.

IMG_6266

Project 3

Large Tosho Bonsai (Needle Juniper – Juniper rigida)

Tosho or Needle Juniper Bonsai are not very common in Australia, well not as common as they are in Japan so when I came across this one recently (July 2015) I snapped it up. It’s been field grown for 15-20 years by a bonsai professional and is in fantastic health.

Here’s how the tree was when purchased.

IMG_5513

IMG_5514

IMG_5515


As it is here it stands approximately 1.3m tall from the soil surface.