Category: <span>Project 2</span>

Project 2

Trident Maple #11 – Update July 2017

It’s the start of the repotting season here in Melbourne, Australia and also time for an update on this Trident Maple Bonsai. The root mass has become quite dense and I’m pleased with the development of the roots. I find repotting very satisfying and shows the rewards of the care you give your trees.

Here’s the view when it was removed from the pot. Plenty of roots!

It is always pleasing to see a mass of fine feeder roots.

On my last trip to Japan I purchased a pot with this tree in mind. It’s got really nice patina and will be perfect for the tree as it continues to develop. The maker is Hattori.

So another step taken in the development of this Trident Maple!

Trident Maple Air Layer Repot July 2017
Project 2

Trident Maple #11 – Air Layer update July 2014

I’ve just checked the tree as I’m thinking about whether the layer is removed later this month or of it stays for another year. Here’s what I found…

IMG_9699


All of the sacrificial branches have done their job. The primary branching is well on the way to achieving the thickness I’d like for the tree.

Scars have been rolling over nicely too. Still a heap more work to do but it’s getting there.


Now, what about the roots?

IMG_9700


The base is flaring and looking better.


And the roots are thickening and plentiful! Looks like I’m separating and potting up later this month!

IMG_9702

Project 2

Trident Maple #11 – Air Layer update January 2014

It’s now quite hot in Melbourne Australia with temperatures last week staying well above 40 degrees Celsius. A good watering regime helped prevent any leaf burn on my deciduous trees but I was a little worried about this air layer.

However all has gone really well and here are some updated photos.

Plenty of new growth.

IMG_7330 IMG_7326

Here’s the surface. It’s definitely swelling at the base now.

IMG_7327


I gently removed a very fine layer of the surface soil and it was very pleasing to see plenty of very fine feeder roots.

IMG_7328

Highlighted roots


This will be a much nicer tree once the layer is removed but I’m in no rush at all. I think it will be there for quite some time yet to ensure there are enough roots.

Project 2

Trident Maple #11 – Air layer

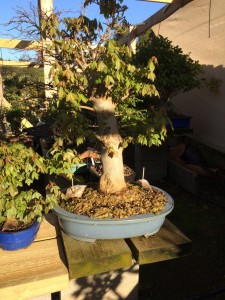
I’ve had this trident maple in the collection for a while now, maybe 3 years and while I’ve been working on the primary branching structure, the nebari has always been a standout issue that needs to be rectified if this tree is going to be given any chance at bright future.

P1080040

The trunk is naturally very white so this year I’d decided it was time to do an air layer and look to fix the roots.

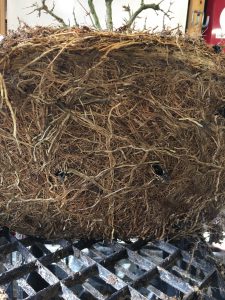
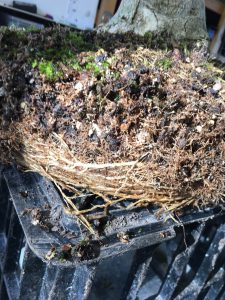
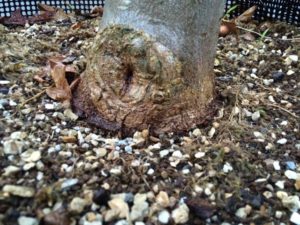
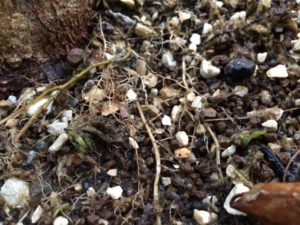
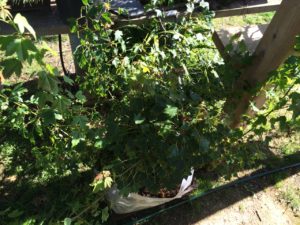
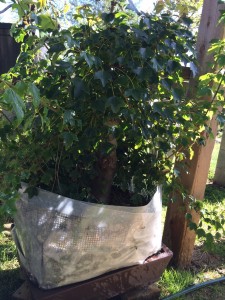
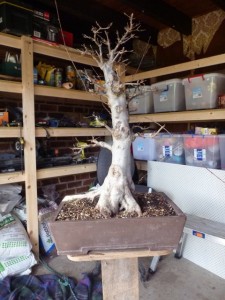
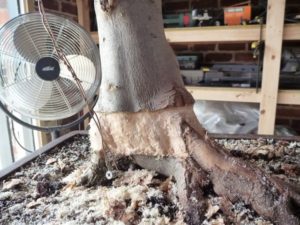
Here’s the current situation –

P1080041 P1080042

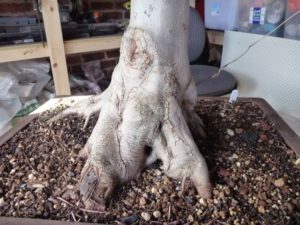
This last pic is around the back of the tree where the issues become far more obvious. There is a large dead section on the top if the root and it’s just ugly.

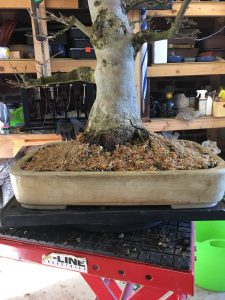
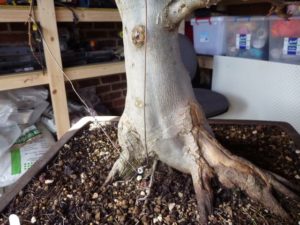
So once I’d decided to do the layer, it’s a matter of exactly where it’s positioned. I wanted to try and get some flare in the base utilising the existing trunk if at all possible so it doesn’t take on the view of a thick stick in a pot. When I measured, the ideal position is just below the existing scar on the front of the trunk. I know this isn’t the best but I’m hoping to rework the wound so it closes up further and adds to the character of the tree.

P1080046 P1080048

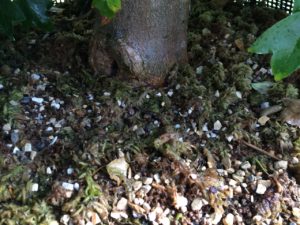
Then the bark and cambium layer were well and truly removed. Ideally the amount removed should have been further but as you’ll see the soil line prevented me from removing anything further.

P1080050

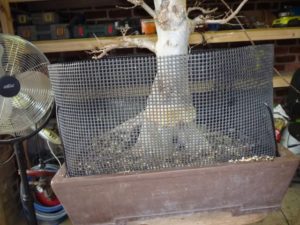
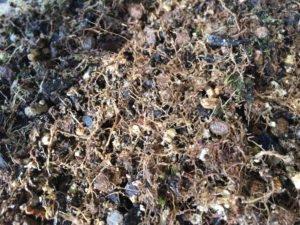
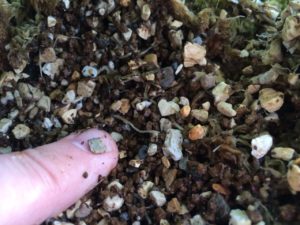
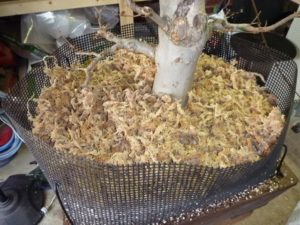
Mesh was placed around the pot and root hormone powder was applied to the trunk. Then the soil mix was added.

P1080051

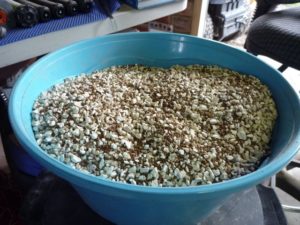
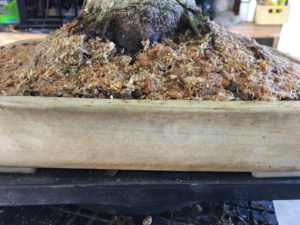
And finally a nice layer of sphagnum moss was added to help retain moisture. I also put a layer of plastic around the mesh (not pictured) to help with moisture retention and new root protection.

P1080052 P1080053

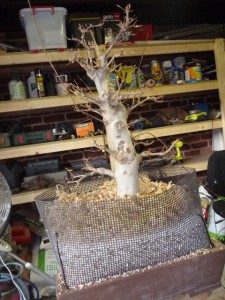
So far the tree is responding well with buds bursting all over the tree after only 3 weeks since the layer was made. Keep an eye on this tree as I’ll be positing more pics in the future.