Category: <span>Project 1</span>

Project 1

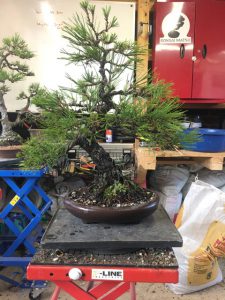
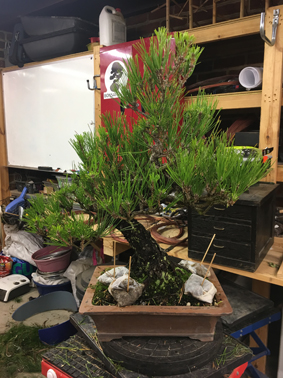
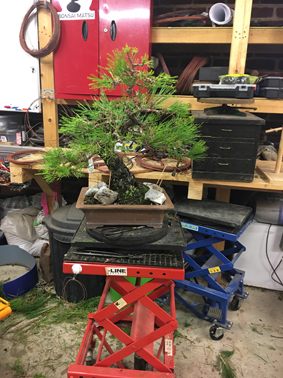
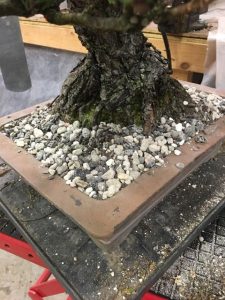
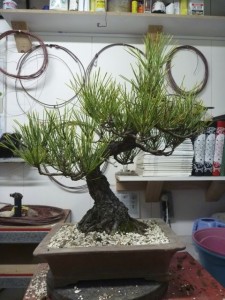
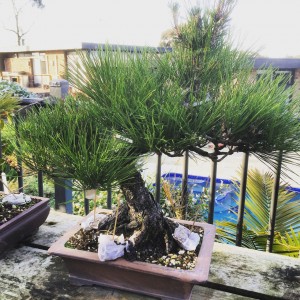
Japanese Black Pine #21 – August 2017 Update –…

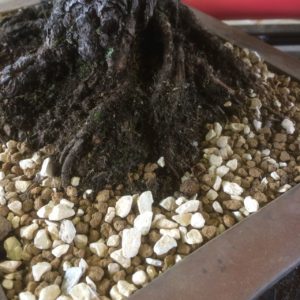
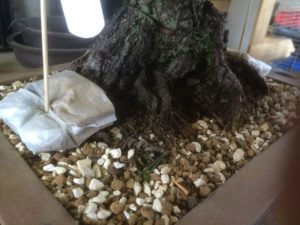
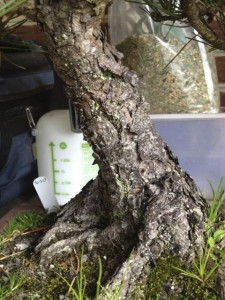
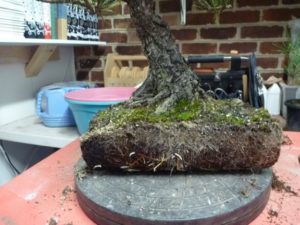
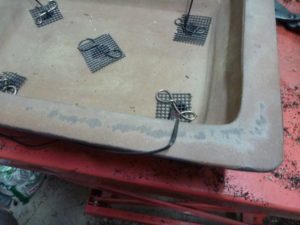
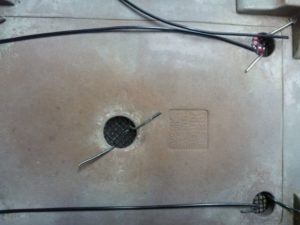
It’s only been one year since this tree was repotted and I wanted to inspect the root growth after my feeding regime and the open mix that was used at last repot. It was becoming difficult to water due to the density of the roots and I’m aware repotting this soon may encourage more coarse growth than if it was left but my focus is still on the roots and ensuring this pine is as strong as it possibly can be.

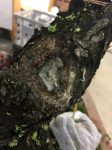
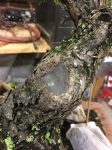
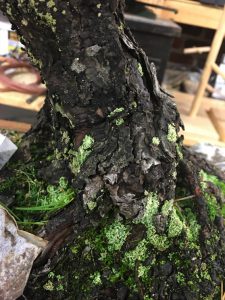
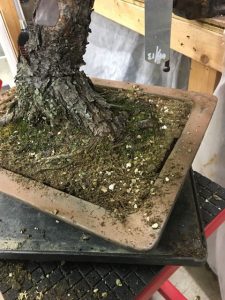
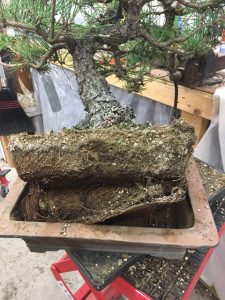
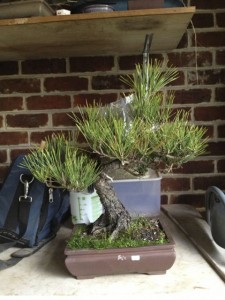
Here’s what I found after just one year – 

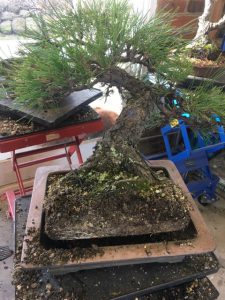
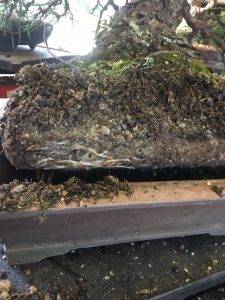
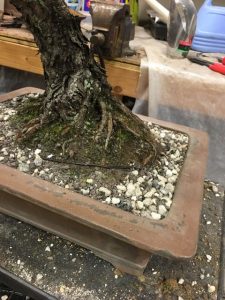
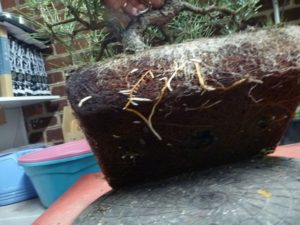
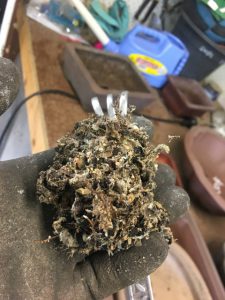
There was a lot of roots and they had just woken from dormancy so the timing was perfect. There was lots and lots of mycorrhiza too which always puts a smile on my dial.

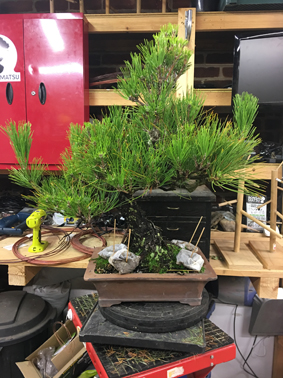
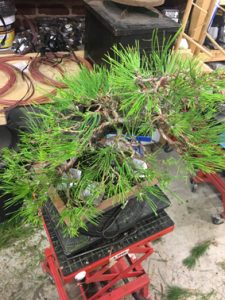
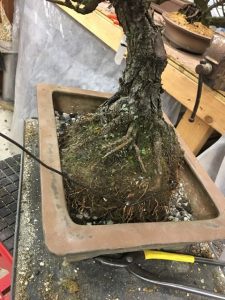
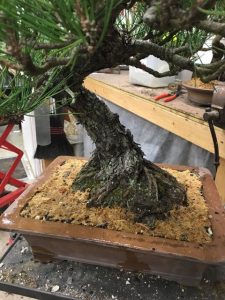
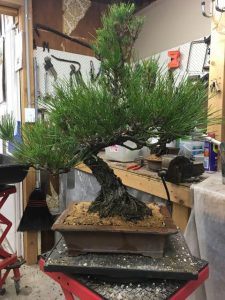
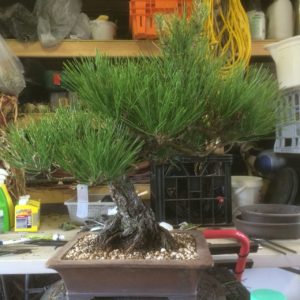
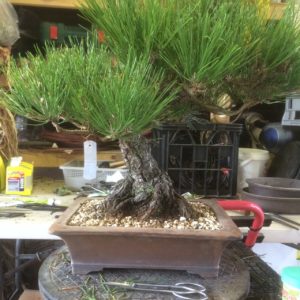
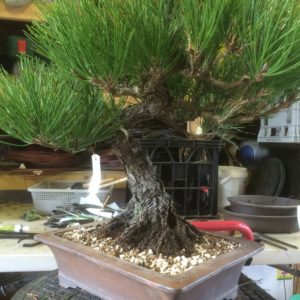
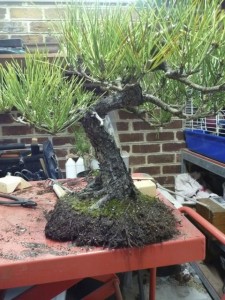
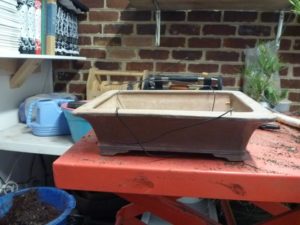
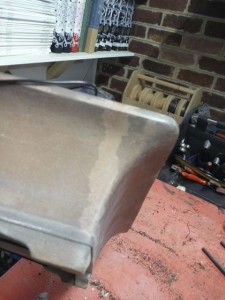
I changed the pot as well.

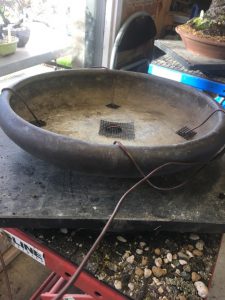
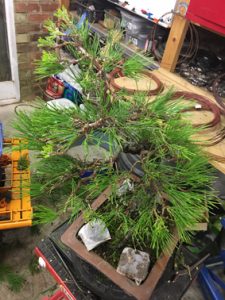
And the end result. Now the plan is to work on the ramification and structure of the tree. The roots are just where I like them.

Project 1

Japanese Black Pine #21 – April 2017 Update –…


So this Japanese Black Pine has had plenty of time for recuperation and to develop a solid root structure. It’s been well fed and left to just build its overall strength and vitality. There is a lot of mycorrhiza visible just below the soil surface so everything looks like it’s heading in the right direction. I have been very keen to get into this one and do the initial structural wiring but I’ve held back…until now.

Here’s the tree as it came of the bench.

There were 3 sacrifice branches that were allowed to run and increase vigour. These will be removed as I’m a little concerned that the tree is putting all it’s energy into the sacrificial growth and not the remaining buds. 

The wound at the back of the trunk has been healing well and it was reactivated and covered with wound putty again. The snails had eaten the last lot!

So the first job was to prune unnecessary buds and branches and remove old needles and just balance the energy of the tree.

The trunk still impresses me and gives me hope.

Warts and all, this is the initial rough wiring of this bonsai. Keep in mind, this is not show wiring but ‘setting the bones’ for the future. 

I’m really pleased with how it is progressing and even though it has been a long, patient journey, that’s what it is, a journey. 


Project 1

Japanese Black Pine #21 – August 2016 Update –…

Well it’s been 3 years since I first acquired this tree and repotted it with the only focus being on the strength of the roots and overall health of the tree. Sometimes you just cannot rush; patience really is a virtue.

IMG_1178

Initially the tree was removed from the pot. The roots had grown so thick and dense that it took quite some effort to free the tree. The akadama that was in the mix had broken down as it does, and a repot it due.

IMG_1179

The roots that had developed were very pleasing to see.

IMG_1181

The roots were pruned, and the nebari corrected in a few minor places then the tree was secured back into the same pot. I like this pot as it’s an old one that was purchased on a trip to Osaka and the style suits this tree.

IMG_1182

The mix was worked into the pot and then levelled.
IMG_1183

IMG_1185
Sphagnum moss was chopped and put on top.

IMG_1189
The lower trunk is one of the most pleasing features of this tree. The age is really starting to show and makes the work that goes into this bonsai all worth it.

So here’s where the tree was and where it is now –

P1080106IMG_1190

The tree was tilted to the left to enhance the first movement on the lower trunk and to also make the second bend less horizontal. It also brings the apex back over the centre of the nebari. The tree was also rotated slightly clockwise in the pot so the apex is now leaning forward a little more.

You can see from these photos that the tree is looking far more vigorous now and a nicer shade of green (as opposed to yellow). The tree still hasn’t been wired and depending on the spring growth, this may be on the cards for summer when the tree is decandled. Or, it might just wait until autumn next year. No rush. That’s why this is a project and not just a styling.


Project 1

Japanese Black Pine #21 – August 2015 Update

So here’s where the tree was –

P1080106


It was well fed and the root mass feels very solid now so leaving the tree alone has done it wonders in regaining its vigour.

Here’s what it looks like now (the apex has a long, long, long way to go) –

IMG_6245


With Spring upon us, the candles have just started to move and I’m looking forward to a good result with decandling in Summer. You can see from the above pic that the fertilisers bags were left on over winter. I do this with the weaker trees if they are not being repotted. I did intend to repot this tree but that can wait another year. Changing the angle to improve the appearance can come later. For now it all about the growth!

Project 1

Japanese Black Pine #21 – April 2015 Update

So, this tree was pretty weak when I first acquired it. Here is a refresher –

IMG_5709

That was in September 2013. It was repotted into an open mix, consistently fed really well with organic fertiliser, kept in full sun and allowed to grow. Only the apex was decandled in summer and basically it was left alone until April 2015.

During this time the roots have grown and the surface had become very compacted so it was time to open it up a little and add a new surface layer.

IMG_4419


While the tree was in the workshop I decided to do some work on the scar around the back of the trunk that is from a sacrifice branch.

IMG_4416


So the inner rim of the cambium layer that has formed was scratched a little to reactivate the healing process. Then the wound is covered with cut paste. We’ll see what has happened in spring.

IMG_4417 IMG_4418


It’s autumn at the moment so I also went through the tree and selected buds and did a small amount of needle plucking. There were 2 year old needles that had started to drop and I wanted to ensure good air flow and sunlight into the inner areas.


Here’s how it looks now –

IMG_4421


It’s much healthier and the overall vigour of the tree has significantly improved as well as the colour of the needles. It’s been given another dose of fertiliser too before winter comes along.

IMG_4428


While I was working on the tree I found the harsh angle of the trunk to be a little disturbing so I’m going to rotate the tree clockwise when I repot in Spring.

IMG_4424IMG_4425


This rotation reveals more of the trunk line, creates more interest and displays the nebari much better.

So for now, it’s more sun, more wind and fertilising until winter.

Project 1

Japanese Black Pine #21 – The Beginning

This tree was recently acquired and I was initially attracted to the beautiful bark and overall age of the tree. The original grower was on hand and let me know it’s 24-25 years old.

I don’t think the tree has been repotted in a very long time and it’s health looks to be needing some TLC. There was clear evidence that spider mites were actively eating the tree.

IMG_5709


IMG_5710 IMG_5711


When the tree was taken out of the pot you could see that there was only dust remaining between the roots.

P1080097

P1080098


Some new roots have just started forming and being the very start of the growing season, the timing for repotting was perfect.

I felt the tree needed to be turned a little clockwise and tilted forward to bring what will be the new apex into prominence.

P1080100


I wanted a pot with some age and character to it for this tree and I had the perfect one. This was picked this one up from Kouka-en in Osaka, Japan earlier this year.

P1080101 P1080102P1080105P1080104

Here it is after repotting. This will spend at least a week in the workshop and out of the weather. The tree was also given a spray with a lime sulphur mix to take care of the mites that have been giving it a bit of a flogging. The big lip on the pot makes it look a little large for the tree but I think it will “grow” into it over time and be a good match. By turning the tree clockwise the nebari now looks more impressive in my opinion.

The tree is 50cm high and the nebari is 20cm.

P1080106

I’m in no rush to wire this one, I will just work on the tree’s health for a while and post more of it’s progress over time.